Build apps while you eat, work or sleep
The complete setup for building applications for free, with no technical knowledge and full control from your phone.
YOU ARE WASTING TIME. While you get on with more important things, you can build applications, FOR FREE, and with no technical knowledge. Just an idea. And you can have FULL CONTROL from your phone 🤯
Right at the bottom I leave you an example of the LATEST thing I built with this setup, while doing other, more important things 👇
All you need is the following:
- OpenClaw/Hermes (free)
- Github (free)
- A MongoDB database (free)
- Frontend hosting on Vercel (free)
- Server hosting on Railway (free)
- A Codex subscription ($0–$100/month) or Claude
In fact, for simpler things with no server, Vercel alone is enough (you need neither MongoDB nor Railway). I prefer this stack because latency to the database is lower. That is, if your application lives on Vercel with NextJS and you have both the frontend and the server there, every database request has to open the connection, which adds latency.
Let's begin (setup — one hour)
1. First we create our repository, which is where your code will live. Go to github.com, sign up and create a repository.
2. Get Codex. Go to chatgpt.com/codex/pricing and buy whichever package suits you. You also have the option of Claude, which personally I like more, but it is pricier (the PRO plan starts at $100). At this point we are getting the AI subscription that will generate our app's code.
3. Install OpenClaw (my pick) or Hermes Agent on your computer. This gives us an agent running 24/7, connected to your phone, which will handle basically everything. The idea is to keep it on a machine that stays on all day. You have several options: install it on a Mac Mini (the best), install it on a VPS (less control but cheaper), or THE BEST FOR BEGINNERS: install it on your own computer and leave it on all the time. This is OpenClaw's official site: openclaw.ai. You install it with the following commands:
Windows: powershell -c "irm https://openclaw.ai/install.ps1 | iex"
Linux or MacOS: curl -fsSL https://openclaw.ai/install.sh | bash
Npm: npm i -g openclaw
Once installed, run: openclaw onboard. Follow the onboarding. Here you should add Codex/Claude at the "model selection" step and link it to your phone, whether through WhatsApp/Telegram (the best), Discord or Slack. Once you reach this point and can send a "hello" from your phone and have OpenClaw reply, it is important to give it access to your Github repository. IMPORTANT: create a folder on the Desktop called "App". Tell OpenClaw to always work in the "App" folder on the Desktop.
4. Give OpenClaw the following prompt:
Generate a repository called [APP_NAME] in the "App" folder on the Desktop and initialise it with a 'Hello World'. It is important that you build a monorepo with yarn workspaces where one folder is the frontend and another is the server. The frontend will be built in NextJS and the backend in NodeJS with Fastify. I am going to connect the server to a MongoDB database. Generate a .env and create the MONGO_URL environment variable for the MongoDB connection. When you are done, make the first commit on the main branch.
5. Once OpenClaw finishes, go to Vercel. Create an account using the Github login/sign up. Your repository will show up. Select that it is a NextJS project, with the root set to "frontend". This will deploy your application's client to a Vercel subdomain (xxxxx.vercel.app). Later you can point whatever domain you want at it.
6. Go to mongodb.com and create a Mongo Atlas account. This will be your free database. Create an organisation, create a project and create an M0 cluster (free). Once the cluster is created, hit the connect button and get the connection string (it will ask you to create an "internal" account, create it). The string will look something like this:
mongodb+srv://account_name:account_password.cluster0.xxxx.mongodb.net
7. Go into the App folder on your Desktop. You will see your repository there, with the name you gave it. Inside you will see the "frontend" and "server" folders. Open server, find the ".env" file and paste that connection into the part that says MONGO_URL. It is very important that you know where this file is, because it holds the sensitive information and secrets your server will use. In the future you might add payments to your app and you will need to put the STRIPE API_KEY in there, among many other possibilities.
8. Go to Railway, create an account, log in or sign up with Github and link the /server folder. Copy and paste the .env file into the "variables" section.
Building your application
At this point your application is already live at xxxxx.vercel.app, the subdomain Vercel generated for you. That is where you will always see the result. Now open your WhatsApp/Telegram and tell your OpenClaw to run your idea. In a while you will have it live on that Vercel page.
You will be able to build games, dashboards, forms, store information: practically anything that crosses your mind. Meanwhile you work, eat, go to the gym or sleep. The agent will do it for you, and it will always be available on that web page. You do not need technical knowledge, just follow the steps to configure the setup and you can build anything.
There are two points left to cover in all this, but they matter for finishing a complete application: payment handling (Stripe) and mailing (Resend). With both it is as simple as signing up and getting the following:
- For Stripe you will need: client_secret, client_id and the whsec (this is the webhook secret; to process the payment you will need to create a webhook in your app, using the subdomain Railway gives you and adding it to Stripe)
- For Resend, get the api_key, very straightforward
All of this goes into the .env!!!!
An example
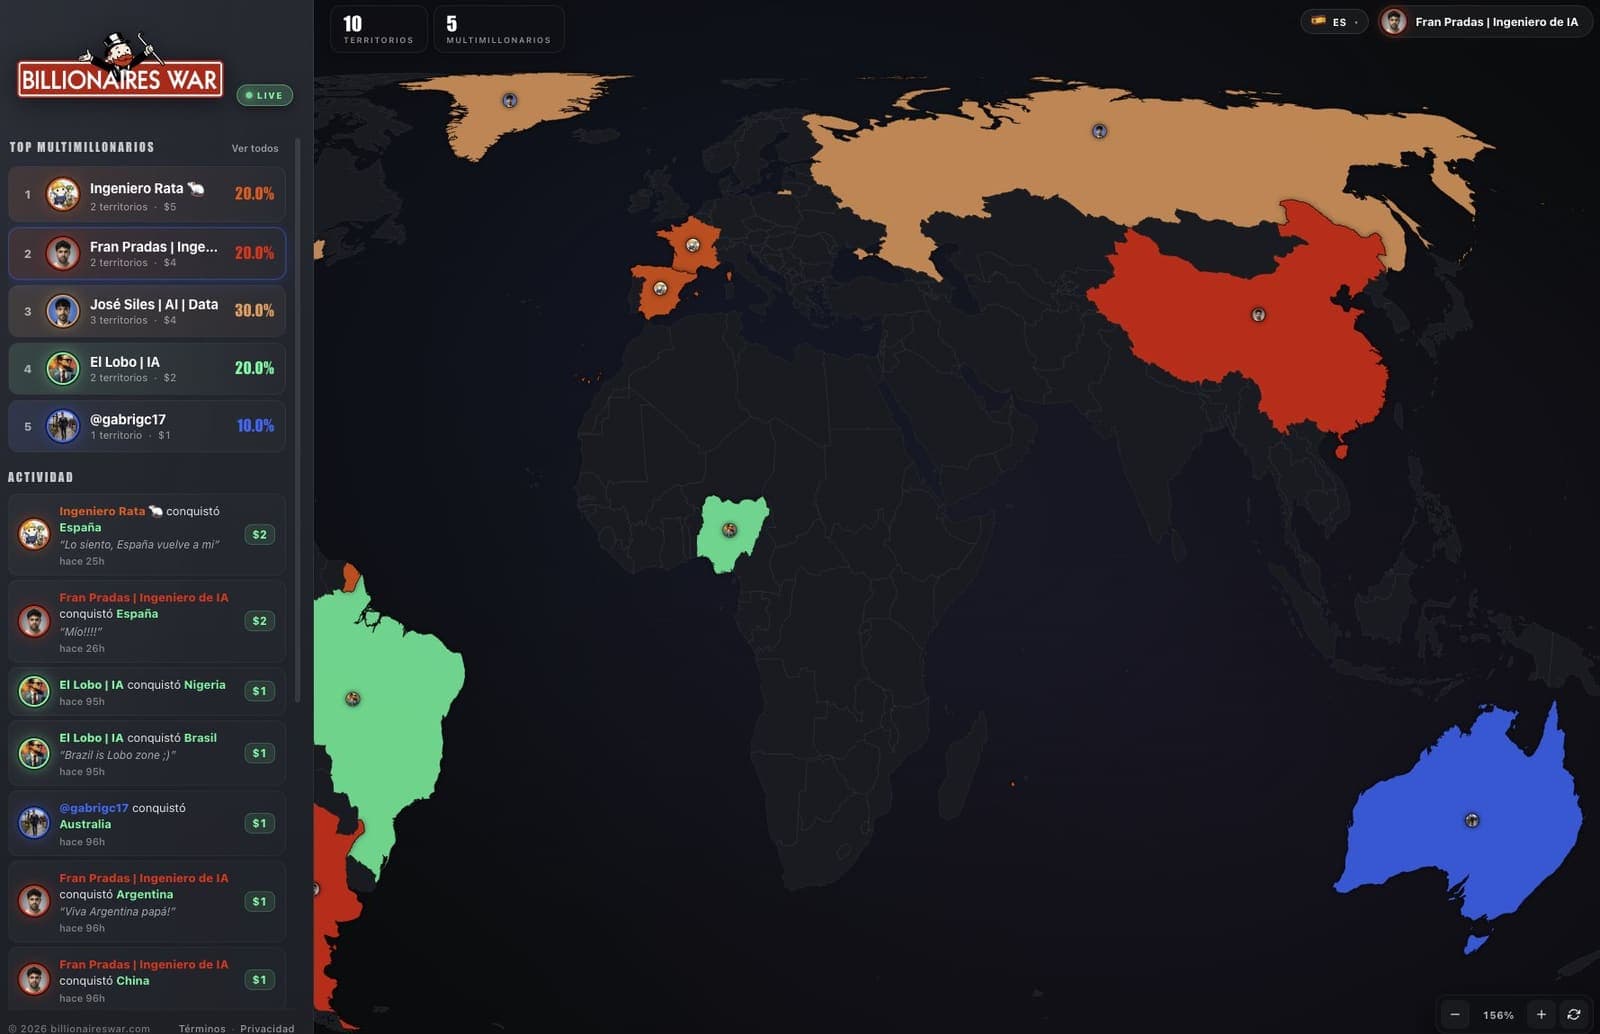
With that same setup I built the app you will find at billionaireswar.com. It is basically a game where people sign up with their social accounts and buy countries so their avatar shows on top of each one (a way of promoting yourself, "The Million Dollar Page" style).