How to edit your reels with AI in 6 steps, with Claude Code
Claude Code edits my reels. I record, hand it the raw video and get back the captions, the cuts, the animated text and the sounds, with the draft in CapCut so I can change whatever I want. These are the 6 steps, with the prompt to paste at each one. The prompts are in Spanish because that's how I use them; Claude understands them in any language, so write them in yours. At the end you can download my style files.
If you don't want to go step by step, open Claude Code (step 1) and paste this prompt. It creates the folders, installs the tools and asks you about your taste and your references to write your style file. The 6 steps are below one by one, in case you'd rather do it by hand or see what each part does:
Prepárame todo para editar mis reels de Instagram contigo. Hazlo en este orden y no pases al siguiente punto hasta acabar el anterior:

1. Crea en mi escritorio una carpeta Edicion y dentro estas 5 carpetas: Original, Estilos, Referencias, Resultados y Sonidos. Trabaja siempre dentro de Edicion.

2. Instálame Remotion, FFmpeg y Whisper para mi sistema, con lo que necesiten (Node y Python). Para Whisper: si es un Mac con chip de Apple, mlx-whisper; si es Windows o un Mac con Intel, faster-whisper. Los dos con el modelo large-v3-turbo y tiempos por palabra. Instala también la skill oficial de Remotion (npx skills add remotion-dev/skills) y prueba que los tres funcionan.

3. Hazme preguntas de una en una para saber cómo me gustan los reels: tipografía, colores, cómo quiero los subtítulos (tamaño, posición, palabra destacada), cada cuánto cambiar de plano, si quiero zoom, qué sonidos uso (whoosh, pops, música) y qué cuentas me gustan. Pídeme 5 reels de referencia: los descargo con el botón de descargar de Instagram y los meto en Referencias. Analízalos con FFmpeg y Whisper: cortes por segundo, tamaño y posición de los textos, colores y sonidos.

4. Con mis respuestas y las referencias, escribe Estilos/mi-estilo.md con números concretos: tipografía, colores en hexadecimal, subtítulos, cortes, zoom, sonidos y las zonas de pantalla que no se tapan.

5. Al acabar, dime que meta mi primer vídeo en bruto en Original. Lo editas con ese estilo: subtítulos con tiempos por palabra, silencios cortados, títulos y textos animados en Remotion con fondo transparente, el borrador en CapCut con cada capa en su pista y el mp4 exportado a Resultados.
1. Download the Claude app and open Claude Code
Get the desktop app from claude.ai/download ↗, sign in and open the  Code tab. Claude Code comes with the Pro plan; the free plan doesn't include it. The app runs on Mac and Windows, and every prompt in this guide works on both.
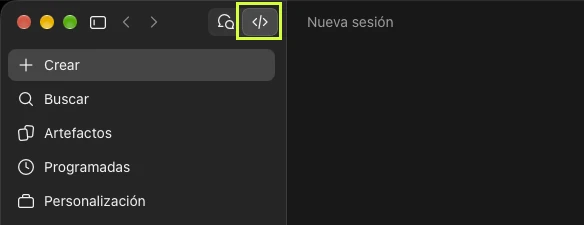
Claude Code works inside a folder on your computer: it reads files, installs programs and runs commands. That's why it can edit video, and why you'll set up its folders in the next step.
2. Create an Edicion folder on your desktop with 5 folders inside
One thing in each, so Claude knows what's your video, what's a reference and where to put what it exports.
| Folder | What goes in it |
|---|---|
| Original | Your raw footage, straight off the phone |
| Estilos (Styles) | Your style .md files: font, colours, captions, cuts |
| Referencias (References) | The reels you like and want yours to look like |
| Resultados (Results) | What Claude exports: the final video and the layers |
| Sonidos (Sounds) | Whooshes, pops, risers and music |
What matters is that all 5 sit inside one Edicion folder: you open Claude Code there and it sees everything. Make them by hand or ask for them:
Crea en mi escritorio una carpeta Edicion y dentro estas 5 carpetas: Original, Estilos, Referencias, Resultados y Sonidos.
Then, in Claude Code, pick the Edicion folder as the working folder.
3. Install these 3 tools
You don't need to know how: Claude installs them for you. All three are free (Remotion, for individuals and companies of up to 3 people).
| Tool | What for |
|---|---|
 Remotion | Graphics and animated text: the title, the pills, the captions. It's video written in code, and Claude writes it very well |
 FFmpeg | The cuts: removing silences, splitting clips, zooming and putting it all together |
 Whisper | Captions with the exact timing of every word. On a Mac with Apple silicon, mlx-whisper; on Windows or an Intel Mac, faster-whisper. Both with the large-v3-turbo model |
Instálame Remotion, FFmpeg y Whisper para mi sistema, con lo que necesiten (Node y Python). Para Whisper: si es un Mac con chip de Apple, mlx-whisper; si es Windows o un Mac con Intel, faster-whisper. Los dos con el modelo large-v3-turbo y tiempos por palabra. Instala también la skill oficial de Remotion (npx skills add remotion-dev/skills). Cuando acabes, prueba los tres con un vídeo de Original y dime si funcionan.
The final edit stays in  CapCut, which also runs on Mac and Windows. I ask Claude to leave me the draft with every layer on its own track (title, captions, points, sounds), so I can move or delete anything without asking for the whole video again. If a caption comes in late, I drag it myself and that's it.
4. Download 5 reels you like
Find five reels with the style you want for yours and save them in Referencias. Many of them can be downloaded with Instagram's own download button.
Pick reels in the same format you'll shoot. If you talk to camera, reels talking to camera; if you film without talking and put text on top, reels like that. Mixing formats gives Claude a style that belongs to none of them.
5. Ask Claude to build your style from your references
Claude watches the five reels and writes a .md file with your style. That file is what makes all your videos look alike. Ask for numbers: "big captions" is useless to it, "84 px" isn't.
Mira los 5 reels de Referencias: saca fotogramas con FFmpeg y transcribe el audio con Whisper. Con eso escribe Estilos/mi-estilo.md con la tipografía, los colores, los subtítulos, los cortes, los sonidos y las zonas de la pantalla. Todo con números: px, segundos y colores en hex. Enséñamelo antes de guardarlo.
Read it and fix what doesn't fit. If something's off, just say so:
Los subtítulos más pequeños, de 3 palabras como mucho, y la palabra clave en amarillo en vez de en verde. Guárdalo.
This is the core of mine. Montserrat everywhere, white captions with a black outline and the key word in lime, flat boxes and a shot change every 2 or 3 seconds:
# My reels style

## Type
- Montserrat 900 for titles (-0.045em) and 800 for text (-0.03em). Nothing else.

## Captions
- Montserrat 800 at 84 px, uppercase, white with a 12 px black outline.
- The key word in lime #D4FF3A.
- Phrases of 3 words or 14 letters at most. Each one pops in (scale 0.8 → 1).
- At chest height (y 1420).

## Boxes
- White, flat, radius 22. No shadows, no glow, no blur.
- Almost square, 2 to 4 in a row. Never a strip from edge to edge.

## Cuts
- A shot change every 2-3 s, on the pauses in the voice.
- Zoom alternating 1.0 and 1.2, with a hard cut.

## Sounds
- A riser at the start and pops when the title appears.
- A whoosh 0.12 s before each point and a pop as it comes in.

## Screen zones (1080×1920)
- Nothing above y 190: that's where the Reels bar sits.
- Top elements between y 190 and y 690, never covering more than half the face.

## Cover
- A real frame, tight shot (zoom 1.2) and the text in a white pill.
6. Put your footage in Original and tell Claude to edit it
Drop the raw video in Original and the sounds you want in Sonidos. Then paste this:
Edita el vídeo de Original con el estilo de Estilos/mi-estilo.md. Transcribe la voz con Whisper con tiempos por palabra, corta los silencios con FFmpeg y alterna el zoom entre 1.0 y 1.2 cada 2-3 s. Haz el título y los subtítulos en Remotion con fondo transparente y pon los sonidos de Sonidos. Déjame el borrador en CapCut con cada capa en su pista y exporta el mp4 a Resultados.
The first one takes a while. The next ones go much faster, because the style file is done and Claude repeats the same thing with another video. Check the result in CapCut before posting: if something covers your face or sits under the Reels bar, ask Claude to move it or move it yourself on its track.
Download my style
If you want to start from mine, here are my files (in Spanish). Put them in Estilos and tell Claude to use them, or change the font and colours to make them yours.
| File | What it is | Download |
|---|---|---|
| mi-estilo.zip | All three files together. Unzipped, the mi-estilo-reels folder drops straight into the .claude/skills folder in your user folder as a skill (Mac and Windows) | Download ↓ |
| mi-estilo-GUIA-INSTAGRAM.md | My editing style: title, captions, boxes, cuts, screen zones, sounds and cover | Download ↓ |
| mi-estilo-SKILL.md | The skill that tells Claude how to edit a reel: folders, tools and steps | Download ↓ |
| mi-estilo-reglas.txt | The checklist Claude goes through before handing you the reel | Download ↓ |